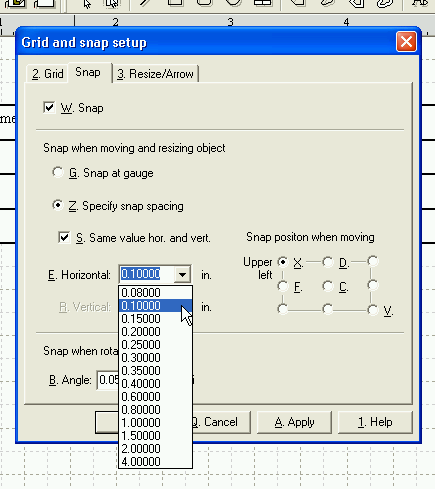
Choose [Options] > [Grid and snap setup] from the top menu.
The [Grid and snap setup] dialog will be displayed.
Click on the [Specify snap spacing] and mark the [Same value hor. and vert.]
marked; then choose 0.1 inches in the [Horizontal].
Click on the [OK] button.
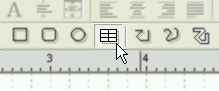
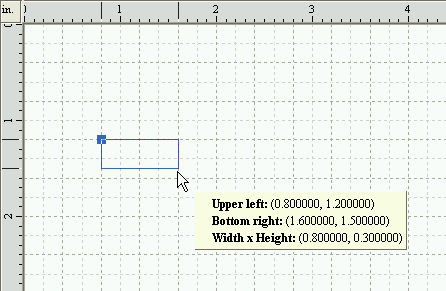
Activate the [table tool] command in the toolbar.
Hold down the left mouse button in the Canvas; drag the mouse pointer bottom
right until you have outlined the area you require for the table object;
and release the left mouse button.
As a result, a table object will be created.
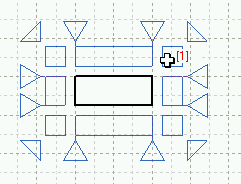
Activate the [Figure edit tool] command in the toolbar.
The handling lines will be displayed.
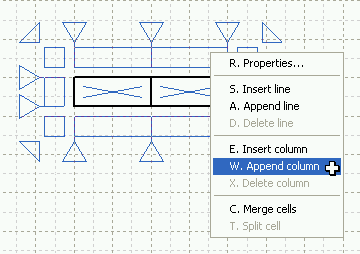
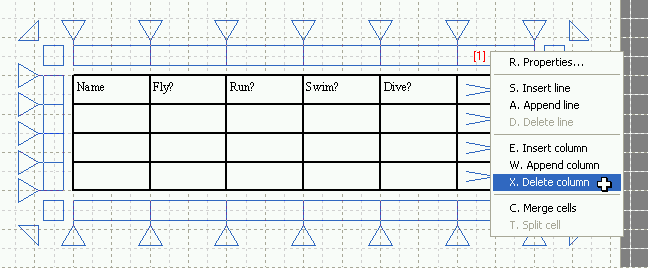
Click in the area [1] below with the right mouse button.
A popup menu will be displayed; then click on the [Add column] command.
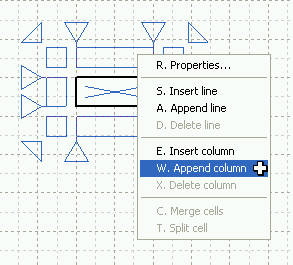
A new column will be add in the right of the selected column.

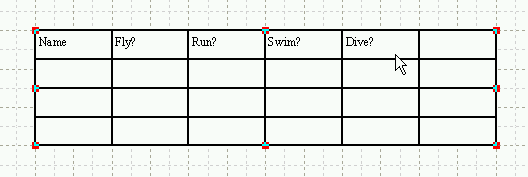
In the same way as, add columns as illustrated in the following graphic.
Click the Canvas with left mouse button avoiding the handling lines to clear the selection.
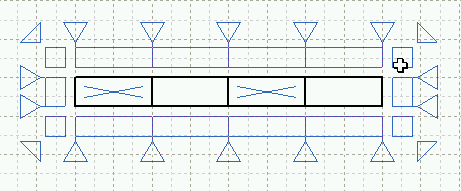
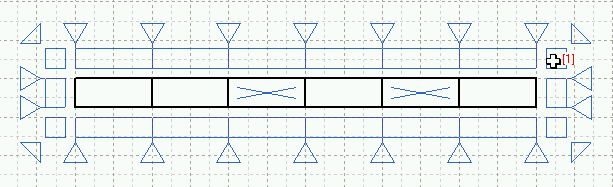
Hold down the right mouse button at the area [1] below and drag the mouse pointer right, and release the right mouse button at the area [2].

A popup menu will be displayed.
Click on the [Add column] command to add two columns.
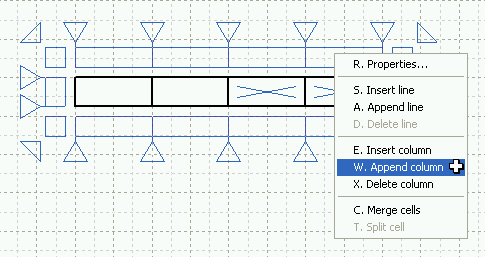
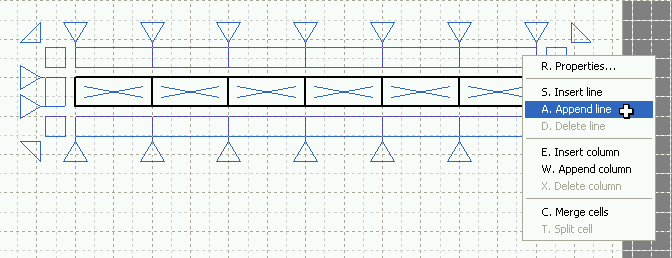
Click in the area [1] below with right mouse button.
Every cell will be selected and a popup menu will be displayed.
Then click on the [Add line] command.
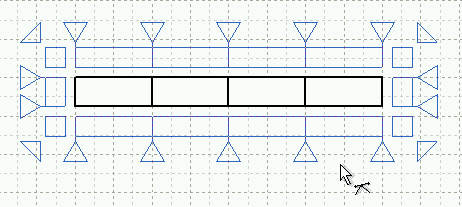
In the same way as, add lines.
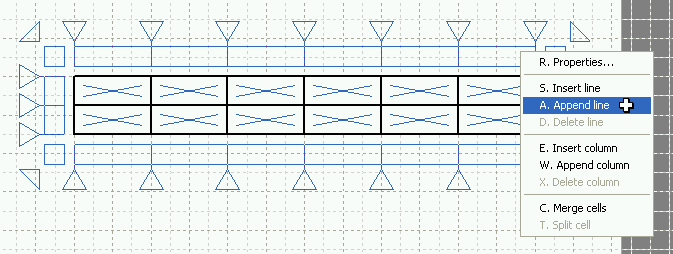
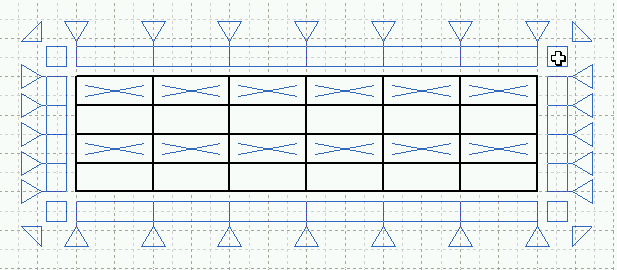
Confirm there are four lines in the table.
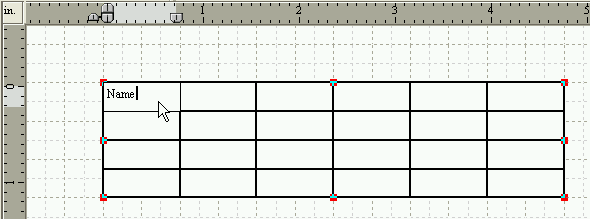
Click in the upper left corner cell to select it.

Activate the [Text edit tool] command in the toolbar.
Type "Name" in the cell and click the 'ESC' key to deactivate the command.
The [Figure edit tool] command will be deactivated, but you don't have
to mind.
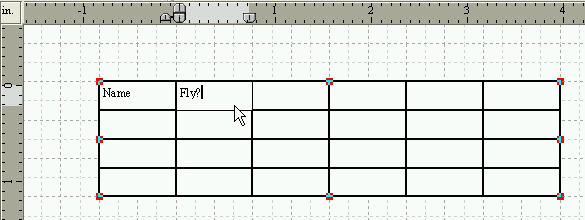
Click in the next cell on the right.
Activate the [Text edit tool] command in the toolbar.

Type "Fly?" in the cell and click the 'ESC' key to deactivate the command.
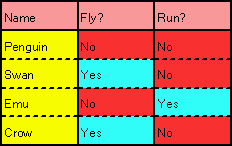
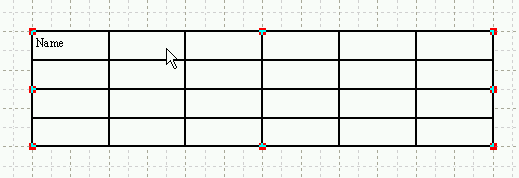
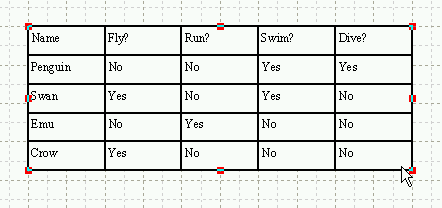
Fill the cells with the text as illustrated in the following graphic.
Activate the [Figure edit tool] command again.
Click in the area [1] below with right mouse button.
A popup menu will be displayed, then click on the [Delete column] command.
The selected column will be deleted.

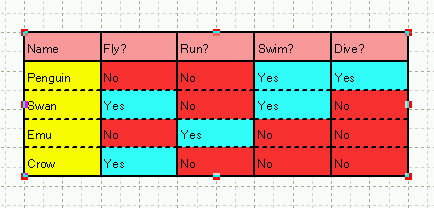
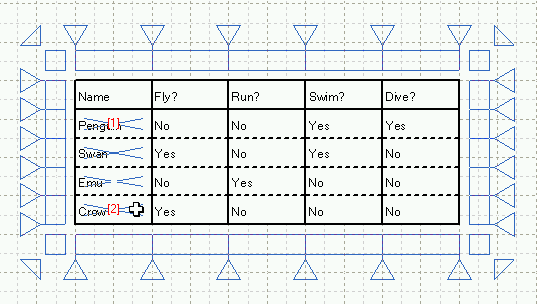
Add one more line and fill every cell with text as illustrated in the following graphic.
Activate the [Figure edit tool] command and click in the area [1] below with left mouse button to select all the cells.

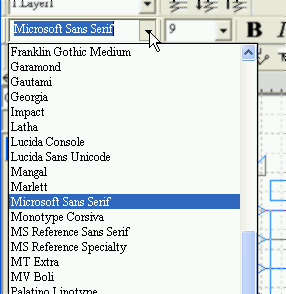
Choose appropriate font in the toolbar to change the font of each text in the table.
Click on the [Align text left] button and the [Anchor text middle] button to align and anchor each text in the table.

Hold down the left mouse button in the area [1] below; drag the mouse pointer bottom; and release the left mouse button in tha area [2].

Choose the 'Tight dash line' in the [pen style] pulldown in the toolbar, to change the style of the selected ruled line.

Hold down the left mouse button in the area [1] below; drag the mouse pointer bottom; and release the left mouse button in the area [2].
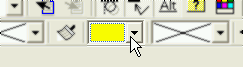
Choose 'Yellow' in the [Brush color selection] pulldown to change the color of the selected cells into 'Yellow'.
In the same way as, change the color of the cells as illustrated in the
following graphic.
Select all 'No' cells like the follwing.
By clicking in cells while keeping the Control-key pressed, you can select
more than two cells.

Change the color of the cells into 'Red'.

Complete the table as illustrated in the following graphic.